Help visitors who arrive at your blog via a link to a deleted post

If you sometimes delete posts from your blog, then it's a good idea to provide some help to people who who arrive at your blog via links to those posts.

(Even if you don't have any links to those posts, it's likely that a search-engine somewhere will have some - and other people may have bookmarked or shared them, too.)

There are two options for doing this:


Post-specific redirects

Use these if you want to re-direct visitors who come to a particular previous post:

Go into Settings > Search Preferences, click Edit beside Custom Redirects.


Click New Redirect, to create instructions for what to do if a visitor tries to navigate to a specific post.

Put the address of the post that you want to make a re-direct for into the From field.

Put the address of the post that you want to visitors to be taken to into the To field.
For both addresses, the part you need to enter is the URL of the post from the first backslash on.  
Do not put in your blog-address
Do include the date-part of the URL and the backslash.
eg
for    http://blogger-hints-and-tips.blogspot.com/2013/01/changing-a-label-value-for-all-posts.html
use   /2013/01/changing-a-label-value-for-all-posts.html

Tick the Permanent check-box.

Click Save.

Click Save Changes.   (Yes, you need to do both Saves)


A generic page-not-found message

Use this if you do not want to set up post-specific re-directs, or if you cannot remember the URL of your deleted posts.

Go into Settings > Search Preferences, and edit the Custom Page Not Found option.

Put in some text welcoming the visitor, explaining that the page they were looking for is no longer available, and suggesting other places that they could try.

 This text can include links to other posts, so long as you hand-code them. (You might like to get code for this using the post editor).

Adding an RSS feed icon to your blog, using Feedburner

Feedburner's chicklets are used to add the standard "orange radar" button to your blog.  This lets readers to subscribe the RSS feed of your choice.   The information is targeted to Blogger users, but most of it applies to anyone who uses Feedburner.


What is a Chicklet, and why you need one:

Previously I've explained how to remove the (ugly and confusing) "Subscribe to Posts (atom)" link from your blog, and why RSS / Subscribe to Posts is important to your blog and how to create a Feedburner feed for it.

But an RSS feed is useless unless people subscribe to it.  So as well as making the feed, you also need to put something in your blog that lets your readers sign up for it.

A standard option for this is the orange square with "radar" markings on it, which many people call a "chicklet" (since it lets your viewer - the chicken? - have access to the feed you are providing).

Feedburner also has options for:
  • Using a custom icon from popular web aggregators
    I'm not sure that this is a great idea, because you don't know what feed-reader software your readers actually use, and the whole point of a feed is that you don't dictate how people see your blog.
  • Using an icon that promotes Feedburner.  This cute, but I've never seen anyone use it.

How to add a chicklet to your blog:


Log in to Feedburner, using the Google account that owns the feed.

Click on the name of the feed you want to provide a subscription tool for.

Choose the Publicize tab.

Choose the Chicklet Chooser option, from the left navigation bar.

Choose one of the options shown:  the default one is the standard-size RSS-radar-button.

Scroll to the bottom of the screen and either
  • Copy the HTML that is shown, and add it to your blog in the same way that you would add any other 3rd party HTML,

    OR  (note:  there have been some reports that the option below doesn't work any longer, as Blogger has changed but tools like Feedburner have not help up)
  • Choose Blogger from the drop down list beside "use as a widget in", and click Go

    This takes you to a Blogger screen where you can choose which blog you want to add the gadget to (if your current login has more than one), and what title to use for it. 

    When this is done, click Add Widget

    This takes you to the Design > Layout tab, where you can drag-and-drop the widget to wherever you want it.  
    (When I tried it just now, instead of the layout screen I got a "bad request" message.  However pressing Save and then View Blog brought up the blog with the gadget showing, and I was able to go back and edit the layout later on).


What your readers see:

Your readers will see an item, wherever you put it, that looks like this:

or something similar, depending on what option you chose from the Chicklet Chooser screen.

When someone clicks on one of these items, they are taken to either a screen where they choose which feed-reader software to add your site to (if you've used the first option), or to the specific feed-reader software.


Customising the widget code:

If you use the generic RSS button, then you may want to customise the widget code slightly:  It looks ugly not to have a space between the picture and the word "Subscribe" - and it's good to have the phrase "RSS" on the screen because that'ss what RSS-savvy people search for when they're looking at a website and want to find the subscribe option.  I also prefer if the subscribe action opens in a new tab/window, rather than taking the reader away from my blog.

This is quite easy to do, if you put a few line breaks in so you can see that
  • the code is actually two separate link statements
  • the first one has an image (the orange "radar bars" that it takes from Feedburner)
  • the second is a text link
  • both of them link to the RSS feed address

So it's quite easy to add a couple of extra spaces (shown as   ), change the text as I've done below, and add   target="_blank"   to both of the links
<a href="http://feeds.feedburner.com/Blogger-hints-and-tips" rel="alternate" type="application/rss+xml" target="_blank">
<img src="http://www.feedburner.com/fb/images/pub/feed-icon32x32.png" alt="" style="vertical-align:middle;border:0"/>
</a>

&nbsp; &nbsp; &nbsp;

<a href="http://feeds.feedburner.com/Blogger-hints-and-tips" rel="alternate" type="application/rss+xml" target="_blank">

Subscribe via RSS

</a>

I generally also put the option to subscribe to my blog by email and the Feedburner FeedCount item (which shows the number of subscribers) in the same area, to give people options, and to encourage them to subscribe.


Related Articles:

Using Feedburner to give your blog a Subscribe by Email option

Adding 3rd party HTML to your blog

Why RSS / Subscribe to Posts is important to your blog

How to create a Feedburner feed for your blog

Keep a backup copy of complicated gadget settings

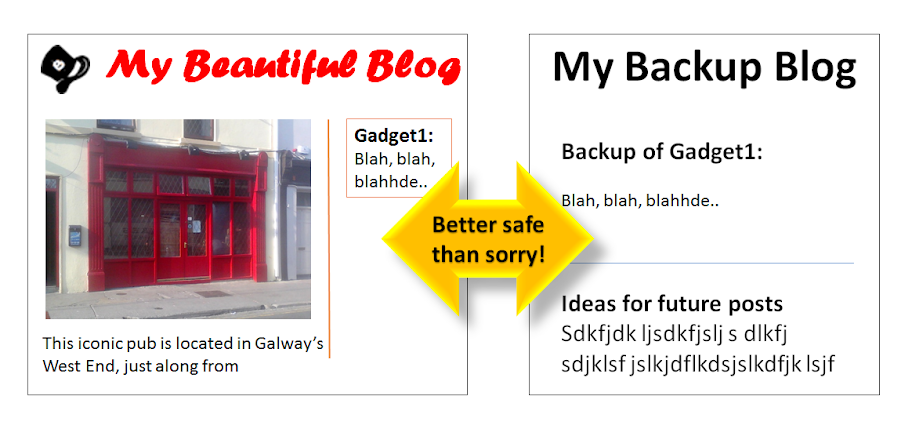
This article explains why it's a good idea to keep a backup copy of settings for your gadget, in particular for HTML/Javascript gadgets that have complicated, hard-to-regenerate, code.


Blogger's backup tools let you take copies of:
  • your post-contents and (separately) 
  • your template. 

Some 3rd party backup tools (eg HTTRack) let you make backup copies of how your blog looks - including the consequences of displaying your gadgets.

But as far as i know, there is no way that you can back up the settings (ie parameters or configuration) that are stored inside the widgets on your blog.

This can be a problem if you accidentally remove a gadget, or if you have an HTML gadget and get the code wrong in it: Blogger is quite unforgiving sometimes, and the HTML/Javascript gadget editor simply removes any code that it doesn't understand.

In some cases, this isn't not a big problem  eg if you show a picture as a gadget, then it's generally easy enough to work out characteristics that you would need to enter to re-create the gadget.

But if you lose a complex gadget (eg your own customised set of subscription buttons), then re-creating it could be difficult and time-consuming.

So - for HTML/Javascript gadgets which have code which you think is complex, I recommend keeping a backup copy of the gadget code somewhere.

Personally I usually put it in a post in a private blog where I draft posts and keep the documentation for each blog - but you could use a range of other places, eg a text file on your computer or on Google Drive, or even any email message to yourself.


How to back up code from HTML/Javascript gadgets in a private blog post

Every time you edit a gadget that you want to keep a backup for, then just before you click Save:
  • Press Ctrl/a to select all the text in the gadget window.
  • Press ctrl/C to copy it
  • Switch to use Blogger in a different window
  • Open up the documentation blog, and navigate to the post where you keep the code for that gadget
  • Edit that post - or make a new one if you don't have one already.
  • Make sure that you're in Compose view, and the Options > Compose Mode setting is on "show HTML literally" (ie not on "interpret HTML")
  • Paste the gadget code into the post, and publish it.

Although this sounds tedious, it's really very quick to do. And losing complicated gadget code, even once, is a good incentive to remember to back it up every time.

Hint: Put a comment to remind yourself where to back this gadget at the top and/or bottom of the gadget code. This reduces the chance that you will forget. A comment is done in HTML like this:
<!-- DON'T FORGET TO BACK UP THIS GADGET CODE  -->


How to back up complicated non-code gadgets

If your gadget has complicated settings which aren't code, one option is to take a screen-shot and save it to your photo collection, or even just a text-file or documentation-blog post where you keep notes about what the settings are.

You won't be able to automatically restore your gadget settings from this, but it should be a good reminder of what you need to do (provided you can find the picture when you need it).

Unfortunately there's no easy way to pack up linked-list or blogroll gadgets at the moment. However making a copy of your site using HTTracker will show you the list, and what the items link to.

Or you could build your linked list code manually (using the same trick that that I recommend for getting picture code) and put it into a HTML/Javascript gadget, which is based up as described above. The code for a handcrafted linked-list gadget looks like this:
<ul>
<li>PUT THE TEXT HERE FOR YOUR FIRST LINK TEXT.</li>
<li>PUT THE TEXT HERE FOR YOUR SECOND LINK TEXT.</li>
<li>PUT THE TEXT HERE FOR YOUR THIRD LINK TEXT.</li>
<li>etc</li>
</ul>


Related Articles:

How to add a picture as a gadget in Blogger

Using the post-editor to build HTML code for gadgets

Prepare your blog-posts in private, using a documentation blog

Use diagrams to make pictures for your blog posts

This post from the Weekly Blogging Tips series is about a cost-effective way to make pictures for blog postings.


The best blogging advice is that every post should have at least one picture:  is a stunning professional-looking shot which perfectly illustrates the point you are making perfectly.

This is a great idea if you're a professional photographer and have all time in the world, or if you can afford to purchase images which are custom made for your blog.

But most of us just aren't in that league.

Sometimes, you can use a search tool to find a re-usable photograph that you can put into your posts. (Remember to download your own copy and put it into a Google picture host, to make sure that it's accepted as the thumbnail picture for the post.)

But another option is to use a diagram - like this.


The picture above is a diagram that I used in a blog-post to emphasise that budgeting for an event is on-going through the planning phase, not a one-time job   I spent quite a while thinking about how to make the point about the original plan vs the on-going feedback loop.

Diagrams don't have to be complicated. Sometimes something as simple as showing a bullet pointed list in a different shape can be an effective way to add "visual texture" to your post and thus make it more appealing for people to read.


There are various tools that you can use to make diagrams.
  • PowerPoint is fantastic especially in in Office 2010 and 20123 where it has shape placement guidelines, as well as the usual squiggly word-art, smart-shapes, gradient-fills etc. 
  • Google Spreadsheets is catching up, though they've got a way to go yet, and your have to use screenshot tools to get an image (JPG, PNG or BMP) file from it. 
  • And most other drawing and word-processing tools include some drawing tools too.

Make it easy for visitors to find other posts in your blog


Some visitors arrive at your blog from a search engine. Others will have subscribed to an RSS feed, or followed a link from some other blog or website. A few might even go directly to your home page because someone told them about it.

But no matter how they got there,
If you want people to read more than one post then you need to make it easy for them to find other posts. [tweet this quote]


Kindness vs Confusion

Some people say "don't confuse your visitors, only give them one way to look at your blog".

But I disagree.
  • Some people are naturally searchers: if they want something they google it. 
  • Others are navigators: they start from a place they know, and follow the directions to get pretty much anywhere else. 

You need to cater for both types of people - and to remember that there are lots of options in between.  And remember that not everyone understands Blogger jargon like "older posts" or "archive".

In general, I think you should
Give people at least two or three different ways to move around your blog [tweet this quote]


Blogger's navigation options

Decide which blogging-directions tool(s) to use based on how well they fit with your blog's goals.   Some options include
  • An archive gadget - lets people choose from timeline of posts
  • A labels gadget - shows a list of topics, and then a list of posts for a selected topic.
  • Showing the labels for every individual post.
  • Cross linking between posts like I did in the two bullet-points above this one - using relevant linking words, of course (aka "anchor text")
  • Using a LinkWith gadget, which shows a fixed number of other posts, chosen from ones with the same label.  You can use one of the several 3rd party options, or just make your own "related links" section at the bottom of each post, like I do for articles here on BloggerHAT.
  • A search-gadget or custom-search-engine (CSE).
    (I use the latter for one pair of blogs that are set as a main site + news site:  visitors see them as the same because I have www.news.mySite.com and www.mySite.com, but Google and Blogger know that they are two separate blogs.    So I have one CSE which searches both sites, and is installed in both of them. 
  • Mega posts: one one of my blogs, I have two monster posts which between them link to every other post on the blog.
  • The "newer posts" and "older posts" links at the bottom of each post (
    You might want to swap them around so they make sense to people who aren't Blogger users.)


What navigation tools have been most successful on your blog?


Weekly Blogging Tips is a series of short posts about the fundamentals of blogging, helping you to understand the relationship between the different tools and techniques that Google's Blogger offers.

Kategori

Kategori