"Simple Related Posts Widget For Blogger" is the most frequently searched on search engines because it is a very important gadget for blogger. It helps visitors to reach more posts on your blog and hence it helps you to multiply your traffic. Related posts widget plays a role of internal linker as it link one post with other so it has a great impact on your traffic as well as seo. Because internal linking is a part of off-page seo. As this gadget is so important for blogger therefore some websites are also formed which provides related posts plugin for your blog but if a website's plugin is used then it may slow down your blog which is not good.
People wish to add related posts widget to multiply their traffic but without affecting there blog's speed so most of the bloggers use simple/link/text only related post widget because it doesn't slow down blog and boost traffic.
I also recommend to use simple/link only related posts widget because thumbnails loads so slow and visitors hate slow loading. I have shared many types of related posts widgets for blogger and in this post I am back with simple/link only related posts widget with 6 different styles.
I hope you will like this post. I would like to know how was this post so leave a comment below the post. To add this widget in your blog and start multiplying your traffic follow below steps:
Click Here To Add Simple Related Posts Widget In Blogger Mobile Site!
Step 1: Go to blogger dashboard.
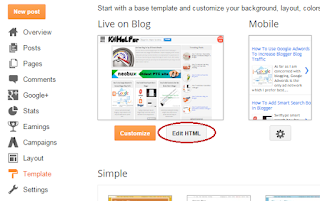
Step 2: Navigate to template and click on edit html.
Step 3: Search for </head>.

Step 4: Copy code of desired related posts widget from below and paste it above </head>.
Style 1:

<b:if cond='data:blog.pageType == "item"'>
<style type='text/css'>
#related-posts {margin: 10px 5px;}
#related-posts h2 {letter-spacing: 1px;font-size: 18px; color: #222;margin-bottom: 15px;position: relative;left: 5px; top: 10px;}
#related-posts a {font-size: 14px; color: #999;text-transform: capitalize;}
#related-posts a:hover {text-decoration: none;color: #555;}
#related-posts ul {list-style-type: none; margin: 0 0 0px 0;padding: 5px;}
#related-posts ul {list-style-type: none;}
#about { float: right; font-size: 12px; }
#related-posts li {padding: 12px;border-bottom: 2px solid #fff;border-left: 5px solid #BCC2B9;background-color: #F4F4F4;}
#related-posts li:hover {background: #F4F4F4;font-weight:bold;background-color: #eee;border-left: 5px solid #188DD7;}
</style>
<script type='text/javascript'>
var relatedpoststitle="You Might Also Like Reading:";
</script>
<script src='https://rawgit.com/101Helper/docs/master/related-post.js' type='text/javascript'/>
</b:if>
Style 2:

<b:if cond='data:blog.pageType == "item"'>
<style type='text/css'>
#related-posts {margin: 13px 5px;background-color: #20DD71;}
#related-posts h2 {color: #FFFFFF;margin-bottom: 13px;left: 7px;top: 10px;font-family: Trebuchet ms;}
#related-posts a {font-size: 14px;color: #999;text-transform: capitalize;}
#related-posts a:hover {text-decoration: none;color: #555;}
#about { float: right; font-size: 12px; }
#related-posts ul {list-style-type: none;margin: 0 0 0px 0;padding: 5px;}
#related-posts li {padding: 12px;border-bottom: 3px solid #eaeaea;background-color: #FFFFFF;}
</style>
<script type='text/javascript'>
var relatedpoststitle="Related Posts:";
</script>
<script src='https://rawgit.com/101Helper/docs/master/related-post.js' type='text/javascript'/>
</b:if>
Style 3:

<b:if cond='data:blog.pageType == "item"'><style type='text/css'>
#about { float: right; font-size: 12px; }
#related-posts {margin: 10px 0px;background-color: #eee;margin-bottom: 40px;}
#related-posts h2 {letter-spacing: 1px;font-size: 18px;color: #222;margin-bottom: 10px;position: relative;left: 10px;top: 10px;}
#related-posts a {position: relative;bottom: 4px;font-size: 15px;color: #999;text-transform: capitalize;}
#related-posts a:hover {text-decoration: none;color: #555;}
#related-posts ul {list-style-image: url('https://blogger.googleusercontent.com/img/b/R29vZ2xl/AVvXsEjr024Y4hQ0kyQ89kymt4Xvrh7e0DLwdTwrwcsNbBSe72p5UW1SUKILYGw8GOn6pLJiPWVEvXuMD3QQDy74_HZLfrLhAvRF0GBrFFrAwOZykK36utZCrtkrOz62SchKW1losyXEiSIJesQ/s1600/rsz_1rsz_icon256.png');margin: 0 0 0px 0;padding: 5px;position: relative;left: 30px;}
#related-posts li {width: 94%;}
#related-posts li:hover {font-weight:bold;}
</style>
<script type='text/javascript'>
var relatedpoststitle="You Might Also Like Reading:";
</script>
<script src='https://rawgit.com/101Helper/docs/master/related-post.js' type='text/javascript'/>
</b:if>
Style 4:

<b:if cond='data:blog.pageType == "item"'>
<style type='text/css'>
#about { float: right; font-size: 12px; }
#related-posts { margin: 10px 0px; background-color: #eee; position: relative; margin-bottom: 40px; }
#related-posts h2 { letter-spacing: 1px; font-size: 18px; color: #222; margin-bottom: 10px; position: relative; left: 10px; top: 10px; }
#related-posts a { position: relative; bottom: 5px; font-size: 15px; color: #666; text-transform: uppercase; }
#related-posts a:hover { text-decoration: none; color: #555; }
#related-posts ul { list-style-image: url('https://blogger.googleusercontent.com/img/b/R29vZ2xl/AVvXsEi5lBzrlZg654SfWDafY9BUV-8_pJ4FMF5mNUuEsDSr0SiOq9fqxucyR9u9g6ys5gmNKQ4HCXpr2lzmiUaHJxUqsyZyk7SQ4gNdW8cqwv9dR3DNPeWY3HMpzWd8uFihD7qKgTydUqH_Zog/s1600/rsz_logo-favicon-large.png'); margin: 0 0 0px 0; padding: 5px; position: relative; left: 30px; }
#related-posts li { padding: 0%; margin-bottom: 7px; width: 94%; border-bottom: 1px dashed #666; }
#related-posts li:hover { font-weight:bold; }
</style>
<script type='text/javascript'>
var relatedpoststitle="You Might Also Like Reading:";
</script>
<script src='https://rawgit.com/101Helper/docs/master/related-post.js' type='text/javascript'/>
</b:if>
Style 5:

<b:if cond='data:blog.pageType == "item"'>
<style type='text/css'>
#related-posts h2 {letter-spacing: 1px;font-size: 18px; color: #222;margin-bottom: 15px;position: relative;left: 5px; top: 15px;}
#related-posts a {font-size: 14px; color: #fff;text-transform: capitalize;text-decoration:none;}
#related-posts ul {list-style-type: none; margin: 0 0 0px 0;padding: 5px;}
#related-posts li {border-radius: 2px;padding: 10px;margin-top: 3px;background-color: #777777; border: 1px solid #777777;}
#about { float: right; font-size: 12px; }
#related-posts li:hover {background: #F4F4F4;border: 1px solid #3079ED;background-color: #4D90F0;}
#related-posts { padding-bottom: 45px; }
</style>
<script type='text/javascript'>
var relatedpoststitle="You Might Also Like Reading:";
</script>
<script src='https://rawgit.com/101Helper/docs/master/related-post.js' type='text/javascript'/>
</b:if>
Style 6:

<b:if cond='data:blog.pageType == "item"'>
<style type='text/css'>
#related-posts { padding-bottom: 45px; }
#related-posts h2 {letter-spacing: 1px;font-size: 18px; color: #222;margin-bottom: 15px;position: relative;left: 5px; top: 12px;}
#related-posts li {font-size: 15px;}
#about { float: right; font-size: 12px; }
#related-posts a,a:hover {text-decoration:none;color: #2288bb;}
</style>
<script type='text/javascript'>
var relatedpoststitle="You Might Also Like Reading:";
</script>
<script src='https://rawgit.com/101Helper/docs/master/related-post.js' type='text/javascript'/>
</b:if>
Step 5: Now search for below piece of code:
<div class='post-footer'>
Step 6: Copy below code and paste it just above the above code:
<b:if cond='data:blog.pageType == "item"'><div id='related-posts'> <b:loop values='data:post.labels' var='label'> <b:if cond='data:label.isLast != "true"'> </b:if> <b:if cond='data:blog.pageType == "item"'> <script expr:src='"/feeds/posts/default/-/" + data:label.name + "?alt=json-in-script&callback=related_results_labels&max-results=6"' type='text/javascript'/></b:if></b:loop>
<script type='text/javascript'> var maxresults=6; removeRelatedDuplicates(); printRelatedLabels("<data:post.url/>"); </script><a href="http://101helper.blogspot.com/2015/08/linktext-only-related-posts-widget-for-blogger.html" id="about" rel="nofollow" style="color: #888;">101Helper</a></div></b:if>
You may find <div class='post-footer'> several times but you have to paste above code above the second one.

Step 7: Click on save template and you are done!
Note: Make sure to label every post of your blog otherwise this widget will not work.
Customization:
Number of posts:
To change number of posts change 6 with desired number of posts in maxresults=6
Title of related posts:
To change title of your related posts widget just replace "You Might Also Like Reading" with your desired title.
How To Show Simple Related Posts Widget In Blogger Mobile Site Under Posts?

If you are wishing to show show a simple related posts widget below your posts in mobile view too then follow below steps. Don't worry it won't effect your mobile site speed! You don't need to follow all steps again, once you have installed this widget in your desktop site then you just have to use the code of step 6 with a little bit changes(I have made). So follow below steps
Step 1: Optimize your blog for mobiles first (Use Custom Blogger Mobile Template).
To use blogger custom template go to Blogger Dashboard > Template > Click on Blogger Mobile Settings Icon as shown in below picture.

Now switch your mobile template to Custom.

Step 2: Copy below code:
<b:if cond='data:blog.isMobile == "true"'><b:if cond='data:blog.pageType == "item"'><div id='related-posts'> <b:loop values='data:post.labels' var='label'> <b:if cond='data:label.isLast != "true"'> </b:if> <b:if cond='data:blog.pageType == "item"'> <script expr:src='"/feeds/posts/default/-/" + data:label.name + "?alt=json-in-script&callback=related_results_labels&max-results=6"' type='text/javascript'/></b:if></b:loop>
<script type='text/javascript'> var maxresults=6; removeRelatedDuplicates(); printRelatedLabels("<data:post.url/>"); </script><a href="http://101helper.blogspot.com/2015/08/linktext-only-related-posts-widget-for-blogger.html" id="about" rel="nofollow" style="color: #888;">101Helper</a></div></b:if></b:if>
Step 3: Go to template > Edit Html and find below piece of code in your template:
<b:if cond='data:top.showMobileShare'>

Step 4: After finding <b:if cond='data:top.showMobileShare'> scroll a little bit up and find below code:
<div class='post-footer'>

Step 5: Just above paste the copied code(step 2).

Step 6: Click on save and you are done!
I hope you like this post and it was helpful to you. If you have any question ask me in comments. Share this post and help others. Follow and subscribe for latest blogging tutorials, gadgets, widgets, tips and tricks. Thanks for visiting 101Helper.
Search tags: Simple related posts widget blogger,Related posts widget for blogger,stylish related posts widget,links,text only related posts widget,101helper blogger gadgets