Social media site is very important for delivering the content towards large size audience. But if your social media site name is different from your domain name then search engine often unable to detect that this is your website�s social media page.
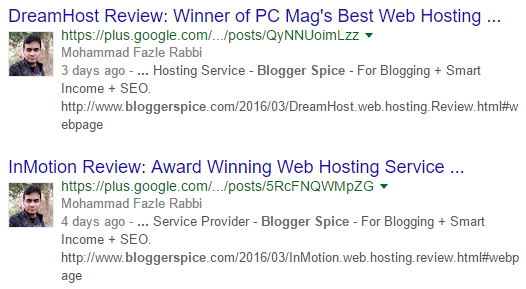
Formerly in Google there was an authorship markup to display author�s image in search engine result page. But this authorship is no more active for site�s author, Google has shut it down and introduced Google Plus page which is helping to display author image on search engine result page.
After publishing content on Blog or website if you share it on Google Plus page then Search robot instantly index it. After few minutes if your search your content on Google chrome then you would see your content is displaying with your picture.
Similarly Facebook has a hidden option which is called Facebook Authorship. This is not exactly like Google authorship but it will indicate Blog or website�s author personal profile on facebook fan page.
What is Facebook Authorship?
Facebook authorship helps the fan page visitors to see and get information about Blog or website author�s personal facebook profile through URL which is visible below shared content. But It will display the profile or page link with its name on Facebook not in search engine. To verify this facebook use a simple markup (META tag), this should be place on your Blog or website�s header section. I think this is little but confusing.
After integrating META tag on your website�s header section facebook authorship markup will activate and once it is activated, visitors will able to follow your personal profile from your Facebook fan page.
Types of Facebook Authorship verification
There are 2 ways we can verify our Facebook Authorship. Which one you would like to prefer this is up to you.
- Personal Page � verifying Facebook Authorship page through personal page means on your Blog�s fan page your personal facebook fan page URL will also display. And users will able to visit your personal page from your website�s fan page.
- Fan Page � If you want to hide your personal facebook page from your Blog readers then you can verify Facebook Authorship through your Fan page. This will display related posts with your Facebook page.
So we can understand that Facebook Authorship helping us to increase our reach, our follower and our fan page brand awareness.
How to setup Facebook Authorship in Blogger and other Blogging Platform?
This isn�t very hard to verify Facebook Authorship through Blogger or other blogging platform. You just need to add a Meta tag in the Blog or website�s head section. But I have mentioned above that there are 2 ways we can verify authorship on Facebook. So I am explaining one by one-
Facebook Authorship verification through Personal Page
This will enable to display your personal page URL with your shared content. And people will able to follow you from your Blog fan page. So first we need to enable Follow me option from personal facebook profile page. It allows the reader to follow you for future posts. However you need to activate it from your Facebook settings. And if you have not enabled then enable it first by following below steps-.
Step 1 Go to your personal Facebook Profile page
Step 2 And top right drop From Menu click on Settings
Step 3 Click Followers link from left Vertical Menu. Select Everybody where written Who Can Follow Me.
Congrats you are now ready to add Facebook Authorship markup in your Blogger site. Please follow the below steps-
Step 1 Log in to your Blogger Account and Go to your Blogger Dashboard
Step 2 Simply Click on -> Template -> Edit HTML
Step 3 Now add the below code after/below opening <head>
<meta content='https://www.facebook.com/profile_name' property='article:author'/>
Customization
- Replace https://www.facebook.com/profile_namewith your personal facebook page URL.
Step 4 Now simply hit the Save template button.
You are now ready to share your content with verified facebook author page.
Facebook Authorship verification through Fan Page
For verifying Facebook Authorship through Fan page you don�t need to enable follower features. Just go through the below steps-
Step 1 Log in to your Blogger Account and Go to your Blogger Dashboard
Step 2 From Blogger Dashboard Click on -> Template -> Edit HTML
Step 3 Now add the below code after/below opening <head>
<meta content='https://www.facebook.com/fanpage_name' property='article:author'/>
Customization
- Replace https://www.facebook.com/fanpage_namewith your personal facebook page URL.
Step 4 Now simply hit the Save template button.
In case of other Blogging platform just edit the theme and find the opening head and simply add the authorship markup.
Now you have successfully setup Facebook authorship on your website. Now you just need to enable it. Don�t worry. It�s not a rocket science technique. Just follow the steps.
Activating Authorship
This is optional method but to confirm facebook authorship you should go through it.
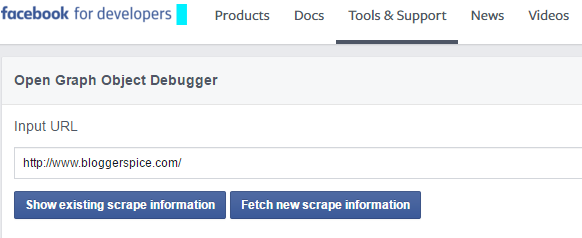
Step 2 Now enter your Website or Blog URL e.g. www.yourdomain.com and click on Debug button.
Step 3 Now check out the preview below on the same page and your authorship URL should display there. If not then click on Fetch new Scrape Information from the top of the page and it will start showing authorship.
It�s time to share something in Facebook fan page. So share any URL and see your personal profile or fanpage URL displaying below the shared content. And your Fan page visitors will easily visit your personal page through your fan page.


EmoticonEmoticon